How to Pack a Hiking Backpack
Learn how to pack a hiking backpack to find essential tips and tricks for organizing gear, maximizing space, and ensuring a comfortable and hassle-free hiking adventure.
Packing a hiking backpack efficiently is crucial for a successful and enjoyable outdoor adventure. Whether you’re embarking on a day hike or a multi-day expedition, the way you pack your backpack can greatly affect your comfort and convenience on the trail.
In this guide, we’ll walk you through the steps of packing your hiking backpack properly to ensure you have everything you need and can access it easily when you need it.
Step 1: Choose the Right Backpack
The importance of selecting the perfect hiking backpack cannot be overstated. Let’s dive deeper into what this step entails:
Backpack Size and Capacity:
- Size and capacity matter: Your choice of backpack size should align with the length and nature of your hiking trip. It’s essential to ensure you have enough room for all your gear while avoiding overloading yourself.
- Daypacks (20-30 liters) are excellent for short day hikes when you only need essentials.
- Mid-sized packs (40-60 liters) are perfect for overnight or weekend trips.
- Larger packs (70+ liters) are necessary for extended multi-day adventures where you need to carry more gear and supplies.
Fit and Comfort:
- A well-fitting backpack is vital for comfort on the trail. Seek backpacks with adjustable straps to achieve a personalized fit, especially considering your torso length.
- Pay special attention to backpacks equipped with padded hip belts. These belts help transfer the weight to your hips, reducing strain on your shoulders and back.
Essential Features:
- When choosing a hiking backpack, prioritize models with ample storage compartments. Multiple pockets, both inside and outside the pack, facilitate organization.
- Look for features such as hydration reservoir sleeves, built-in rain covers, and external attachment points. The inclusion of these features should align with your specific needs and the expected conditions of your trip.
Step 2: Create a Packing List
Crafting a comprehensive packing list is a fundamental step that requires careful consideration:
Trip-Specific Needs:
- Tailor your packing list to the unique requirements of your trip, factoring in aspects like the anticipated weather, the terrain you’ll encounter, and the duration of your adventure.
- Take the weather forecast into account to pack suitable clothing and gear, whether it’s preparing for scorching summer heat or chilly winter conditions.
Categories:
- Organize your packing list into distinct categories, which can include clothing, food, shelter, and equipment.
- For clothing, think in terms of layering to ensure you have appropriate attire for various conditions. Don’t forget items like hats, gloves, and extra socks.
- Food planning should cover the number of meals, snacks, and any dietary considerations.
- Shelter items might encompass your tent, sleeping bag, and sleeping pad.
- Equipment includes essential tools like navigation aids, first aid kits, and cooking gear.
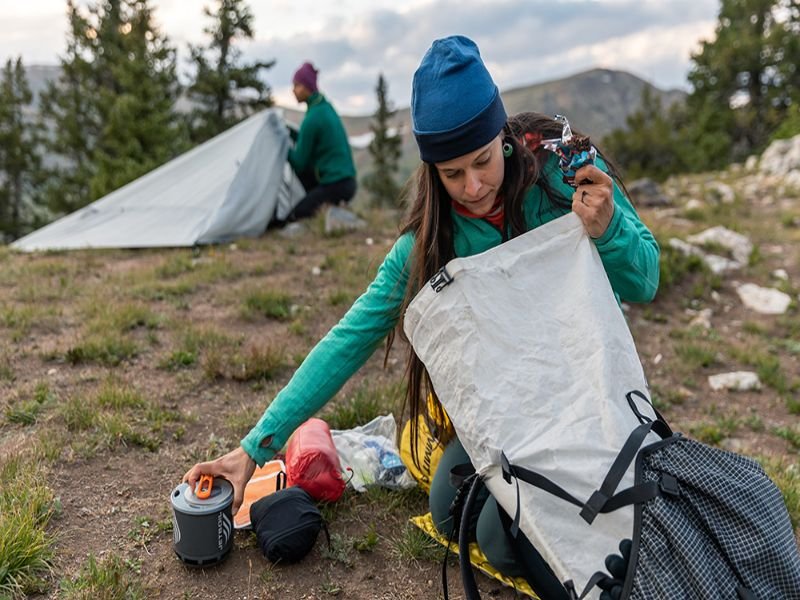
Step 3: Organize Your Gear
Effective gear organization is key to maintaining order and accessibility:
Categorize and Group:
- Following your comprehensive packing list, categorize items within each group. By doing this, you can keep related gear together and reduce the risk of leaving crucial items behind.
- Consider investing in stuff sacks or waterproof bags to compartmentalize and safeguard your gear. These can protect your clothing from moisture and keep your food separate from other items.
Accessibility:
- Items you anticipate needing throughout the day, such as snacks, a first aid kit, or maps, should find their place in outer pockets for quick and easy access.
- Side pockets are well-suited for items like water bottles or compact umbrellas.
- Reserve the top compartment or lid for items you might need quickly, such as a headlamp, rain jacket, or sunscreen.
Step 4: Weight Distribution

Proper weight distribution in your hiking backpack is a key factor in maintaining comfort and balance throughout your journey. Here’s how to achieve it:
Main Compartment and Front Pockets:
- Distribute the weight of your gear evenly between the main compartment of your backpack and its front pockets. This helps ensure that your load is balanced and your center of gravity is stable.
- Placing some weight in the front pockets can be particularly useful for items you’ll need quick access to, like snacks or a map.
Positioning Heavier Items:
- Heavier items, such as cookware, food, or water reservoirs, should be positioned closer to your back within the main compartment. This centralizes the weight and minimizes strain on your shoulders and lower back.
- Lighter items, such as clothing or a rain jacket, can be placed in the outer pockets or on the top of your backpack.
Step 5: Pack Smart
Packing your backpack efficiently is essential for maintaining order and accessibility during your hike. Here are some valuable tips:
Core Items:
- Begin by placing your sleeping bag at the bottom of the main compartment. Consider using a waterproof compression sack to maximize space and keep it dry.
- As mentioned earlier, position heavier gear closer to your back in the main compartment. This might include cookware, food, and other dense items.
- Use your clothing layers to create a cushion between your back and the heavier items.
Outer Pockets:
- Reserve the outer pockets for items you’ll need frequently during your hike. This includes essentials like snacks, a first aid kit, or a trail map.
- Utilize the side pockets for items like water bottles or a compact umbrella.
Top Compartment:
- The top compartment or lid is a convenient spot for items you might need quickly. Store essentials like a headlamp, a rain jacket, or sunscreen here for easy access.
Efficient packing not only ensures you have all the necessary gear but also helps maintain a comfortable balance while hiking. By carefully considering the weight distribution and following these smart packing tips, you’ll be well-prepared for your outdoor adventure.
This level of preparation ensures that you can access your gear and supplies conveniently, making your hiking experience more enjoyable and hassle-free.
Step 6: Secure Loose Ends
Securing your gear properly is essential to ensure a comfortable and balanced hike:
Compression Straps:
- Use the compression straps on your backpack to secure your load and prevent items from shifting during your hike.
- Tighten these straps as necessary to minimize bulk and maintain the stability of your backpack.
- A well-secured load helps distribute weight evenly, reducing strain on your body and enhancing overall comfort.
Step 7: Final Check
Before embarking on your hiking adventure, perform a thorough final check to ensure everything is in order:
Backpack Security:
- Examine your packed backpack to confirm that everything is securely stowed. Make sure there are no loose straps or dangling items that could catch on branches or rocks.
- Check the zippers, closures, and buckles to ensure they are fastened securely.
Gear and Supplies:
- Take a moment to review your packing list one last time. Ensure that you haven’t forgotten any important items, especially essentials like your map, first aid kit, or extra layers of clothing.
- Verify the presence of essential documents, such as permits, identification, and emergency contact information.
By completing these final steps, you’ll be fully prepared to hit the trail with confidence. A securely packed and well-organized backpack, along with a meticulous review of your gear and supplies, will set the stage for a successful and enjoyable hiking experience.
So, with your backpack in order and your checklist completed, venture into the great outdoors, ready to embrace the beauty and challenges of the wilderness.
Key Takeaways (How to Pack A Hiking Backpack)
- Choose the right backpack based on size, capacity, fit, and features.
- Create a comprehensive packing list tailored to your trip’s needs.
- Organize your gear into categories and use stuff sacks or waterproof bags for organization.
- Distribute weight evenly, placing heavier items closer to your back.
- Pack smart by placing your sleeping bag, heavier gear, and clothing efficiently.
- Use outer pockets for quick-access items and side pockets for water bottles.
- The top compartment is handy for items you may need quickly.
- Secure your load using compression straps.
- Perform a final check to ensure everything is secure and that you haven’t forgotten any essentials.